Engineers, Conductors, and Spark Ticketers
We’re currently finishing up our big August update (our roadmap is here), and we wanted to finally show off one of our big new features. As one part of the name for the update, trains are very important to us (and the update too). It’s time to talk about the pinnacle of transportation!
However, setting up your first train can be a little complex, so we wanted to go step by step and talk to you how you can set up the most basic network in August!
Train Basics
To have a train, you first need the Train Tracks! You can build tracks on elevated 1×1 poles, which means that you can very easily build on the mountains. These poles are also height adjustable, so you can have them go up and down, including over each other. You can even build a corkscrew to take your Sparks and items on a rollercoaster adventure.
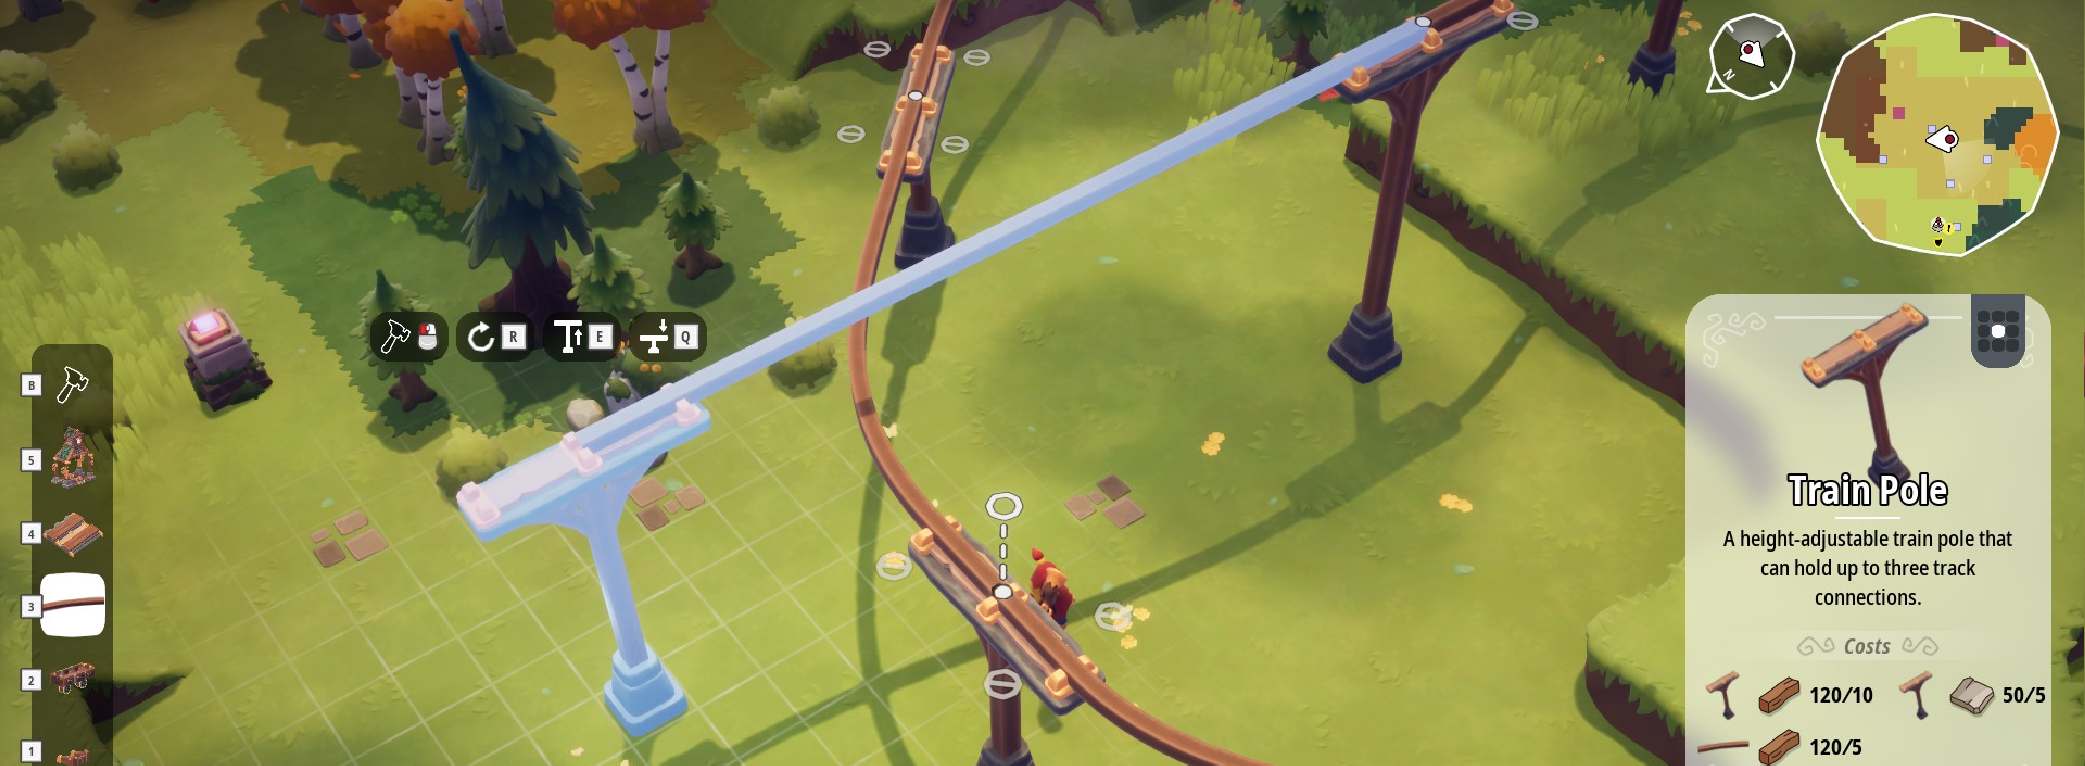
Each pole can handle up to three connections – One “front” connection to the next pole, one “back” connection to the previous pole and one “to the side” connection to a third pole. The side connection is how you make junctions but we’ll talk properly about junctions later.
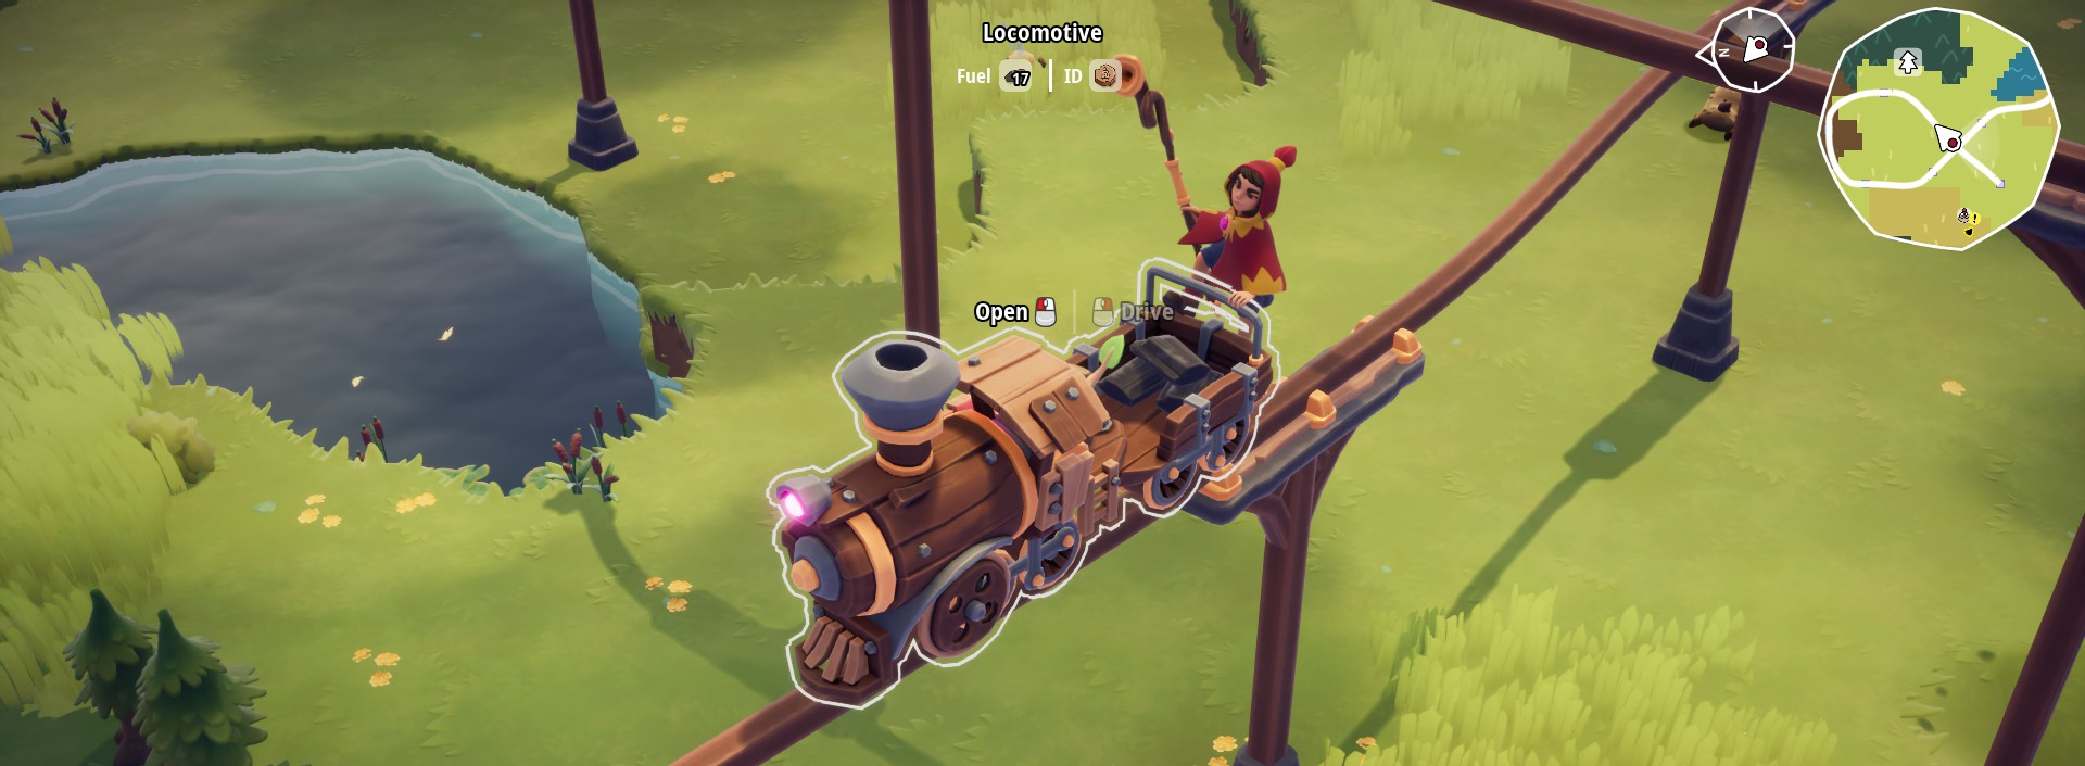
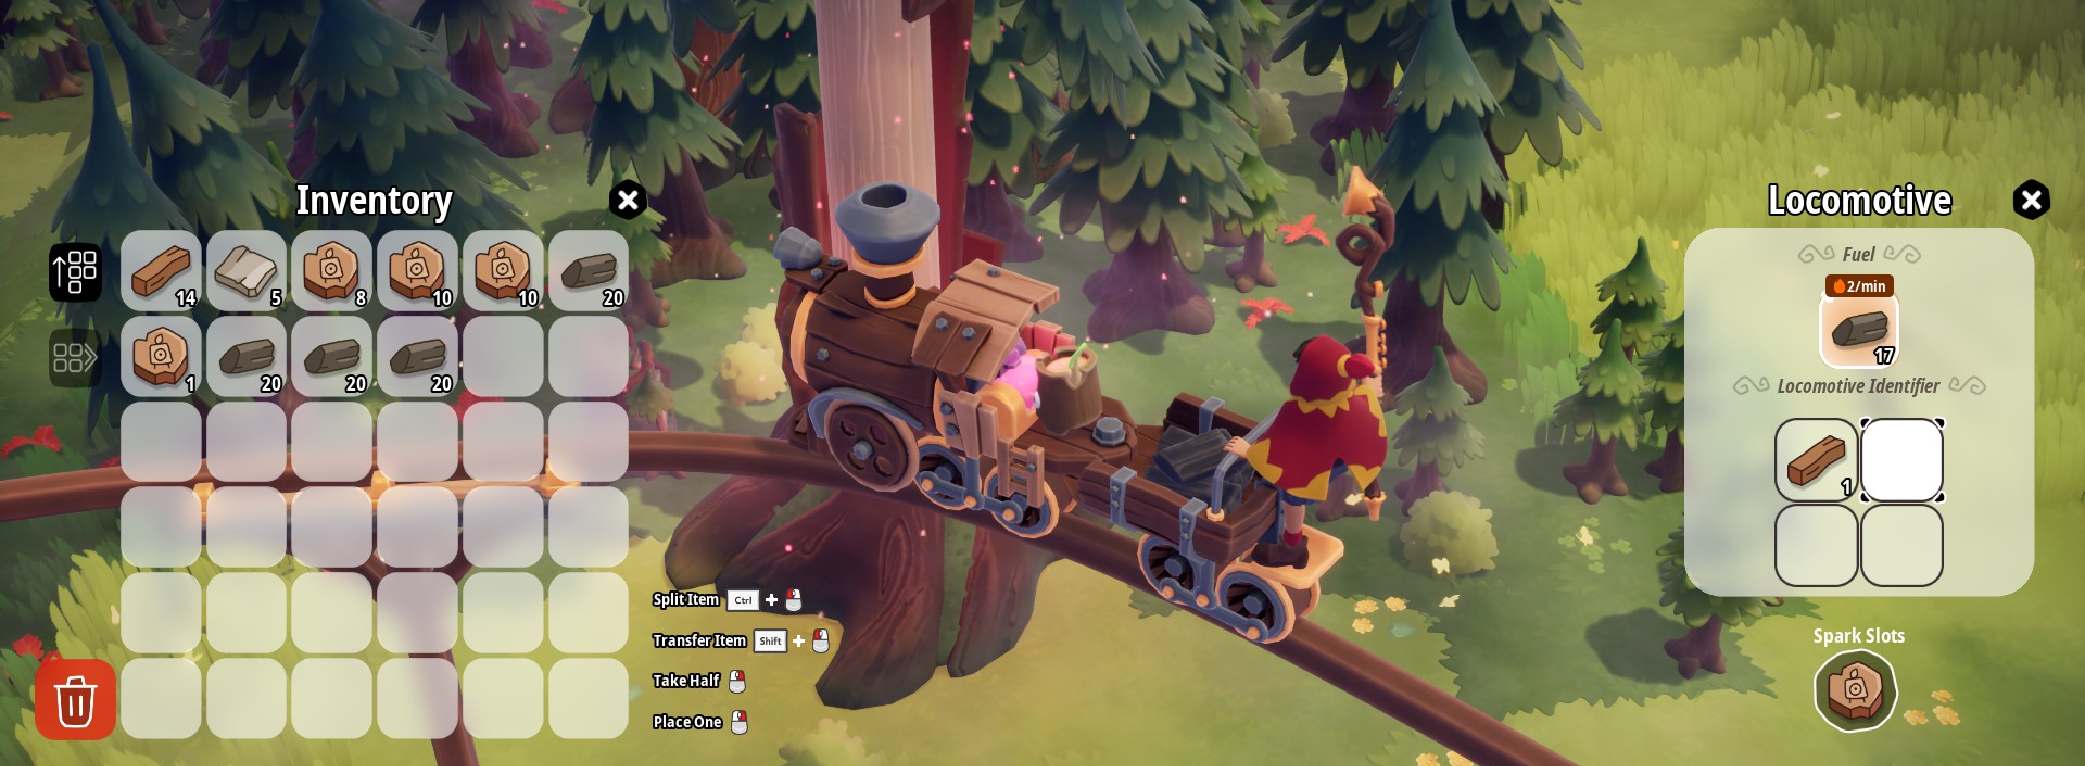
So once you have the tracks, you go back to the Build Menu and build a Locomotive onto the tracks! Each locomotive needs a driver and fuel. Once it’s fueled, you can assign a Spark and it’ll just go forward. You can also manually drive it yourself! When you’re driving, it can go forwards, backwards, and take any arbitrary junctions you want.
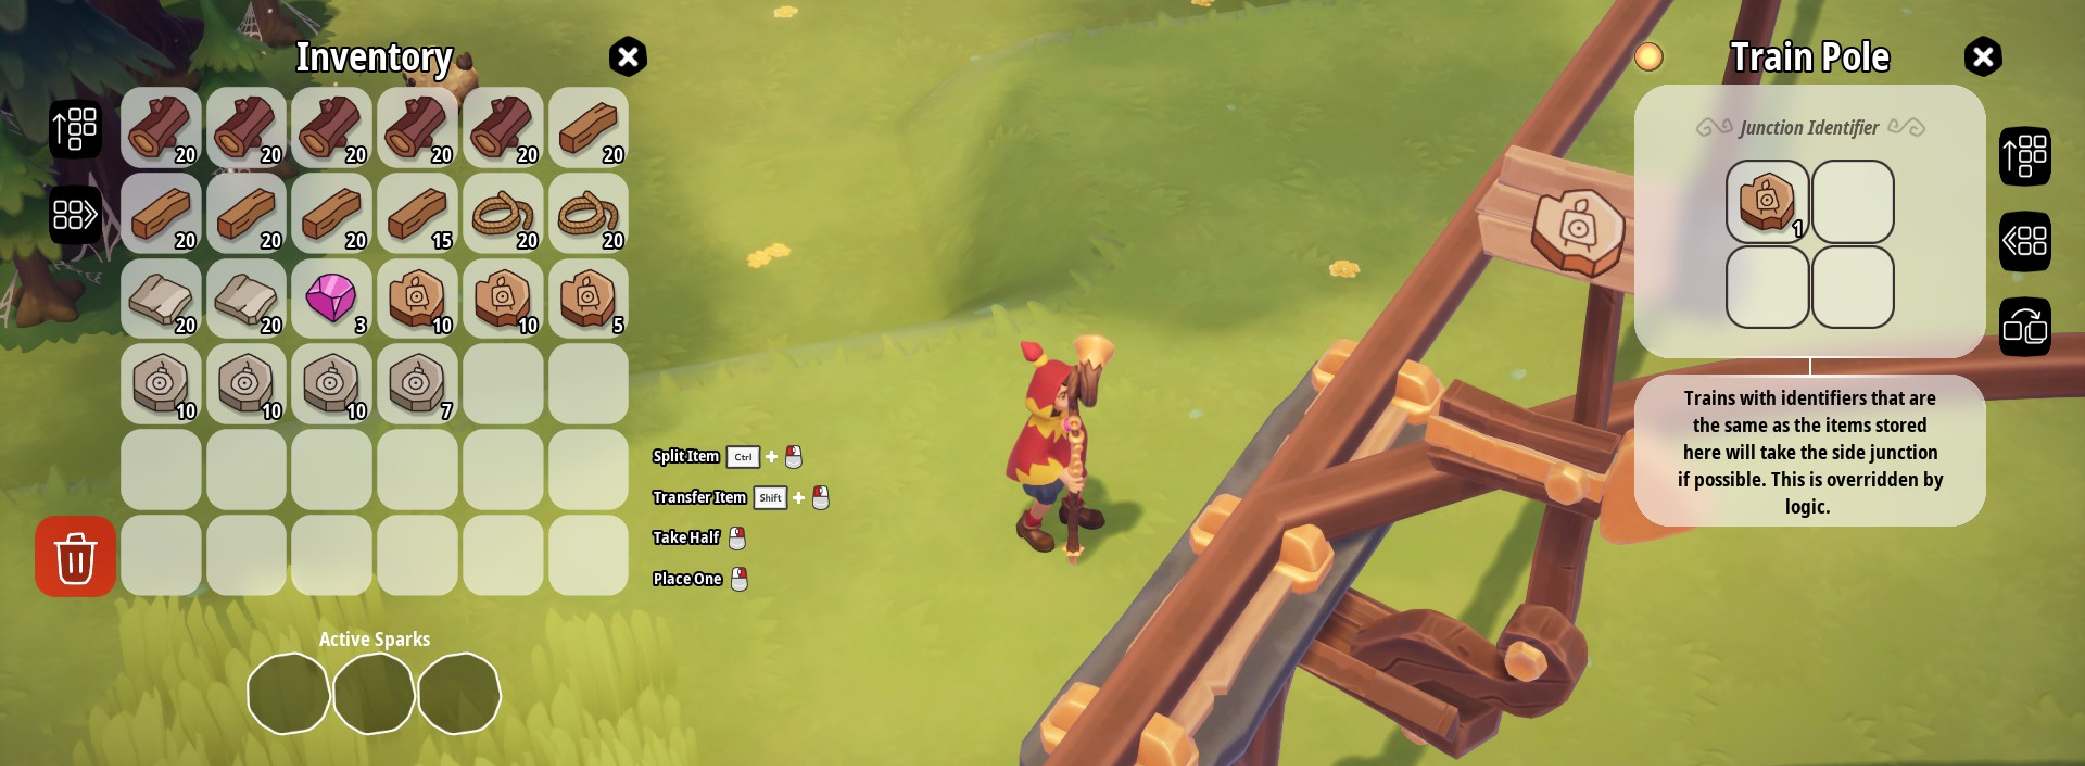
One more important thing to know is that each locomotive can have identifiers. A locomotive can handle up to four different items, and those are for using junctions automatically. But again, we’ll talk properly about that after the basics.
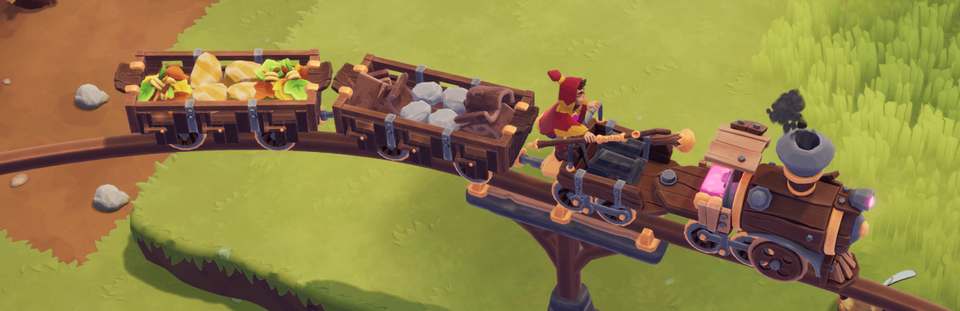
Now that you have a locomotive on tracks, it’s not really a train yet. You can attach Wagons onto a locomotive to make a full train. You can have as many as you want and even attach them in front of the locomotive, if you want!
The wagons can hold a number of items. They also have two seats in them, so if you want to just ride on the train (instead of driving the train) you can hop in one of the wagons and journey along with it.
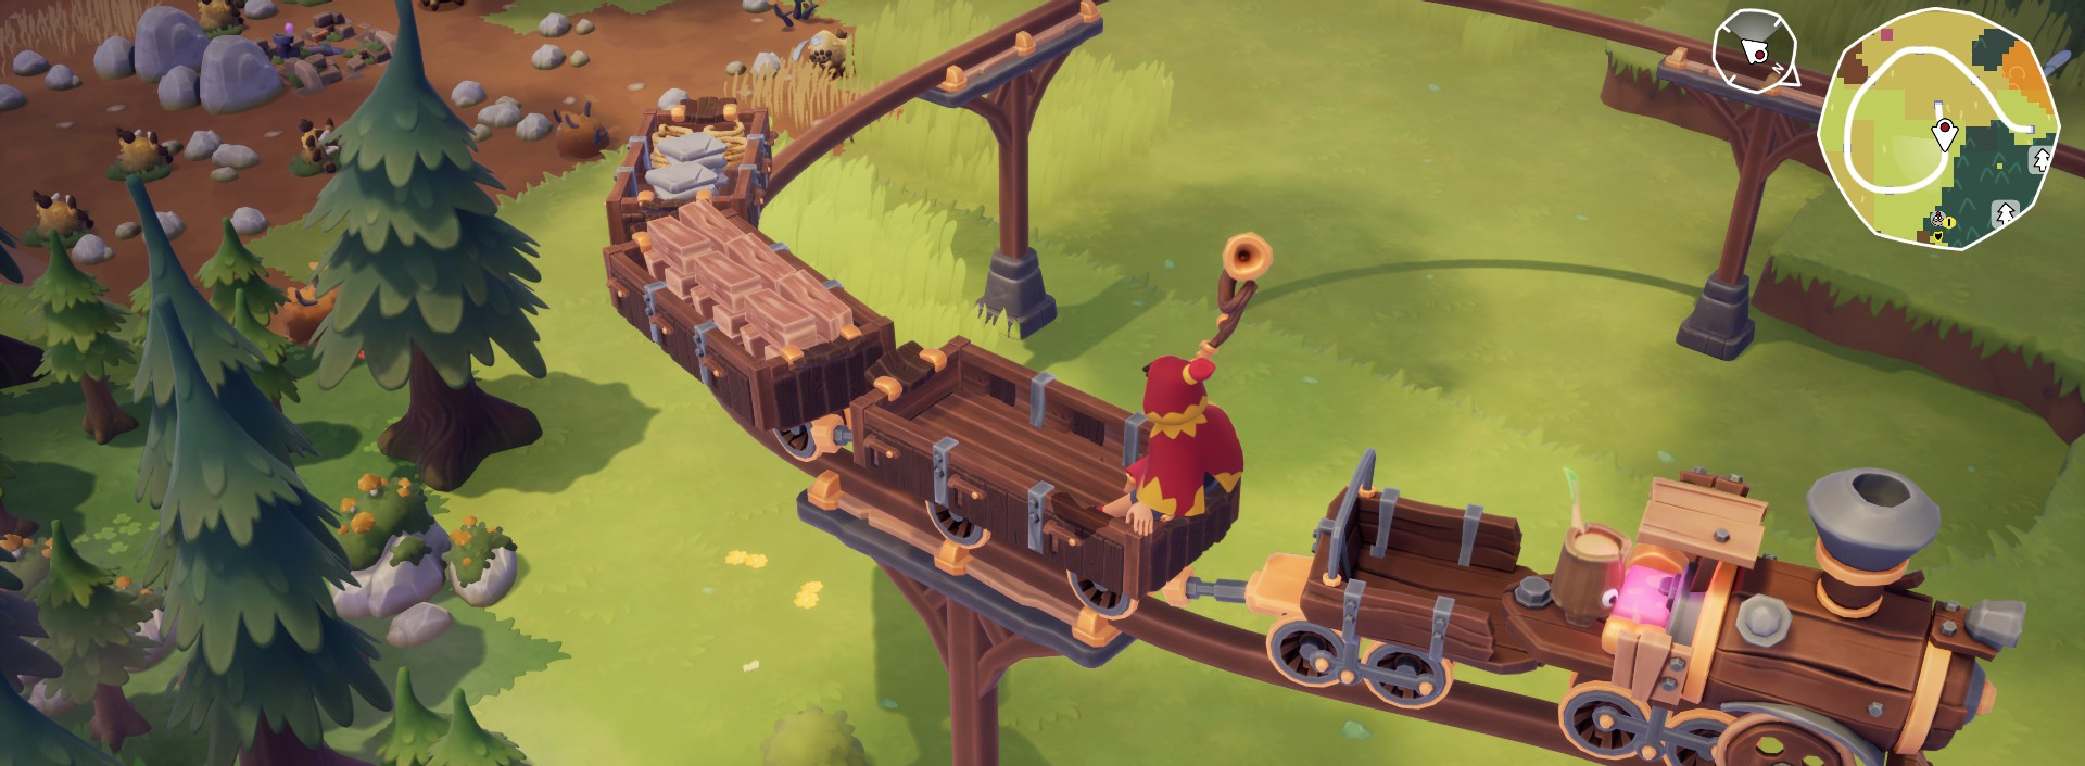
Now you have a proper train! You can put as many trains as you want onto a network – they don’t crash, but they do block each other.
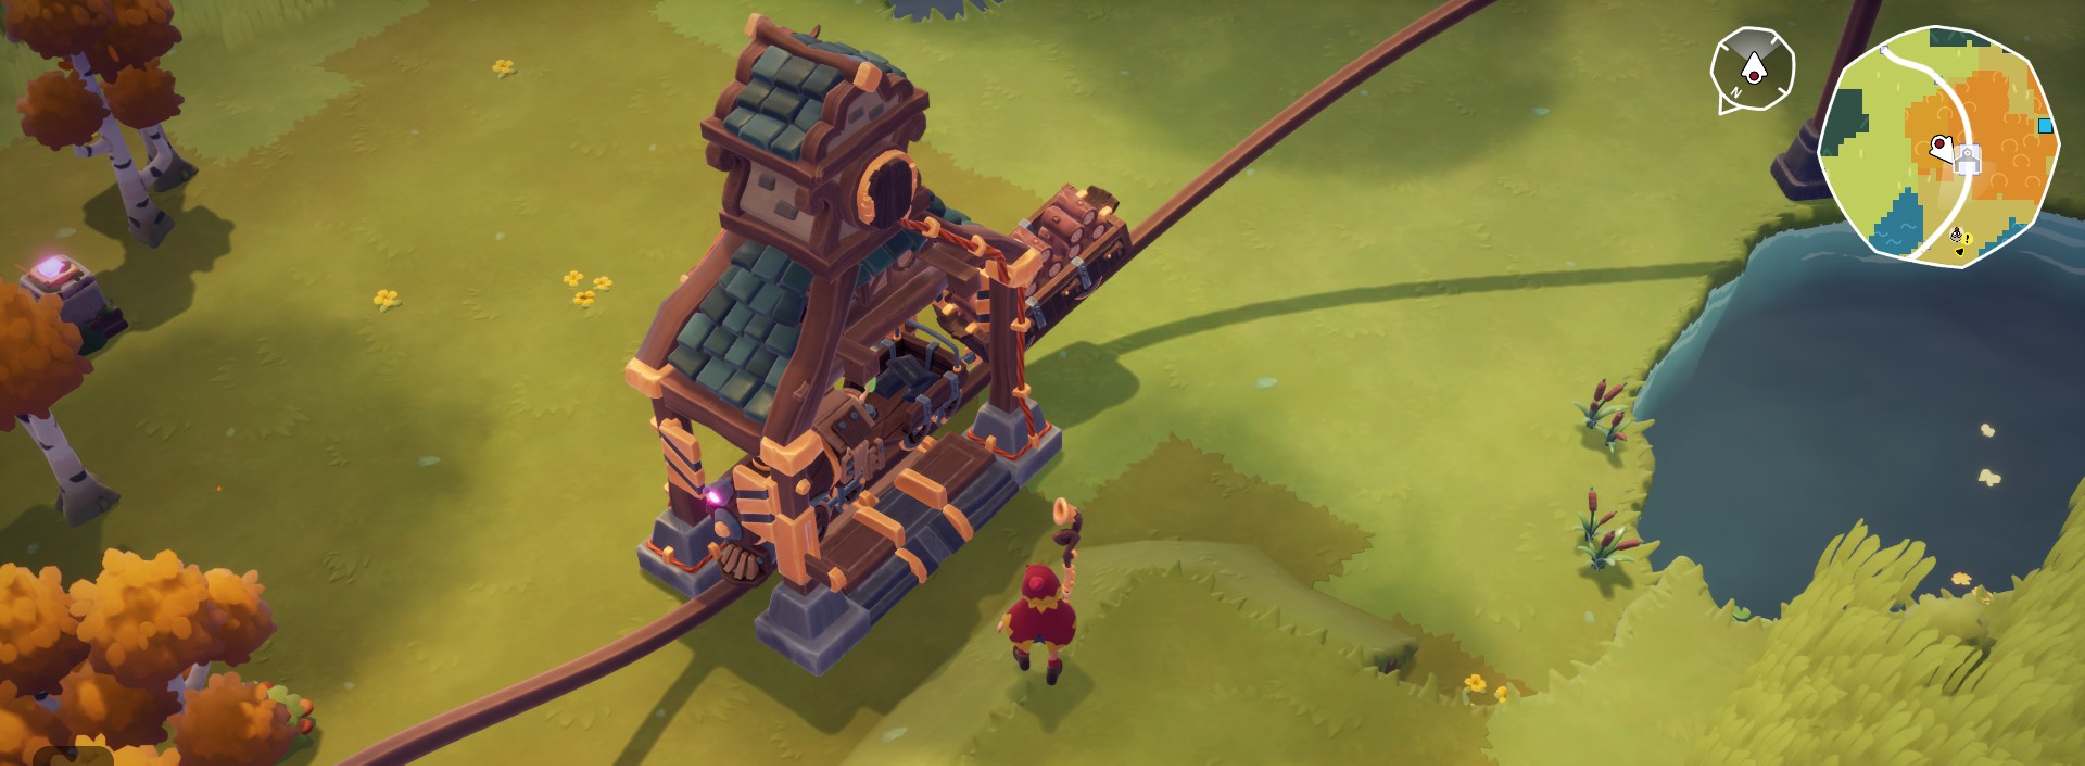
What you need now is a Train Stop. A train stop, as the name suggests, stops the train.
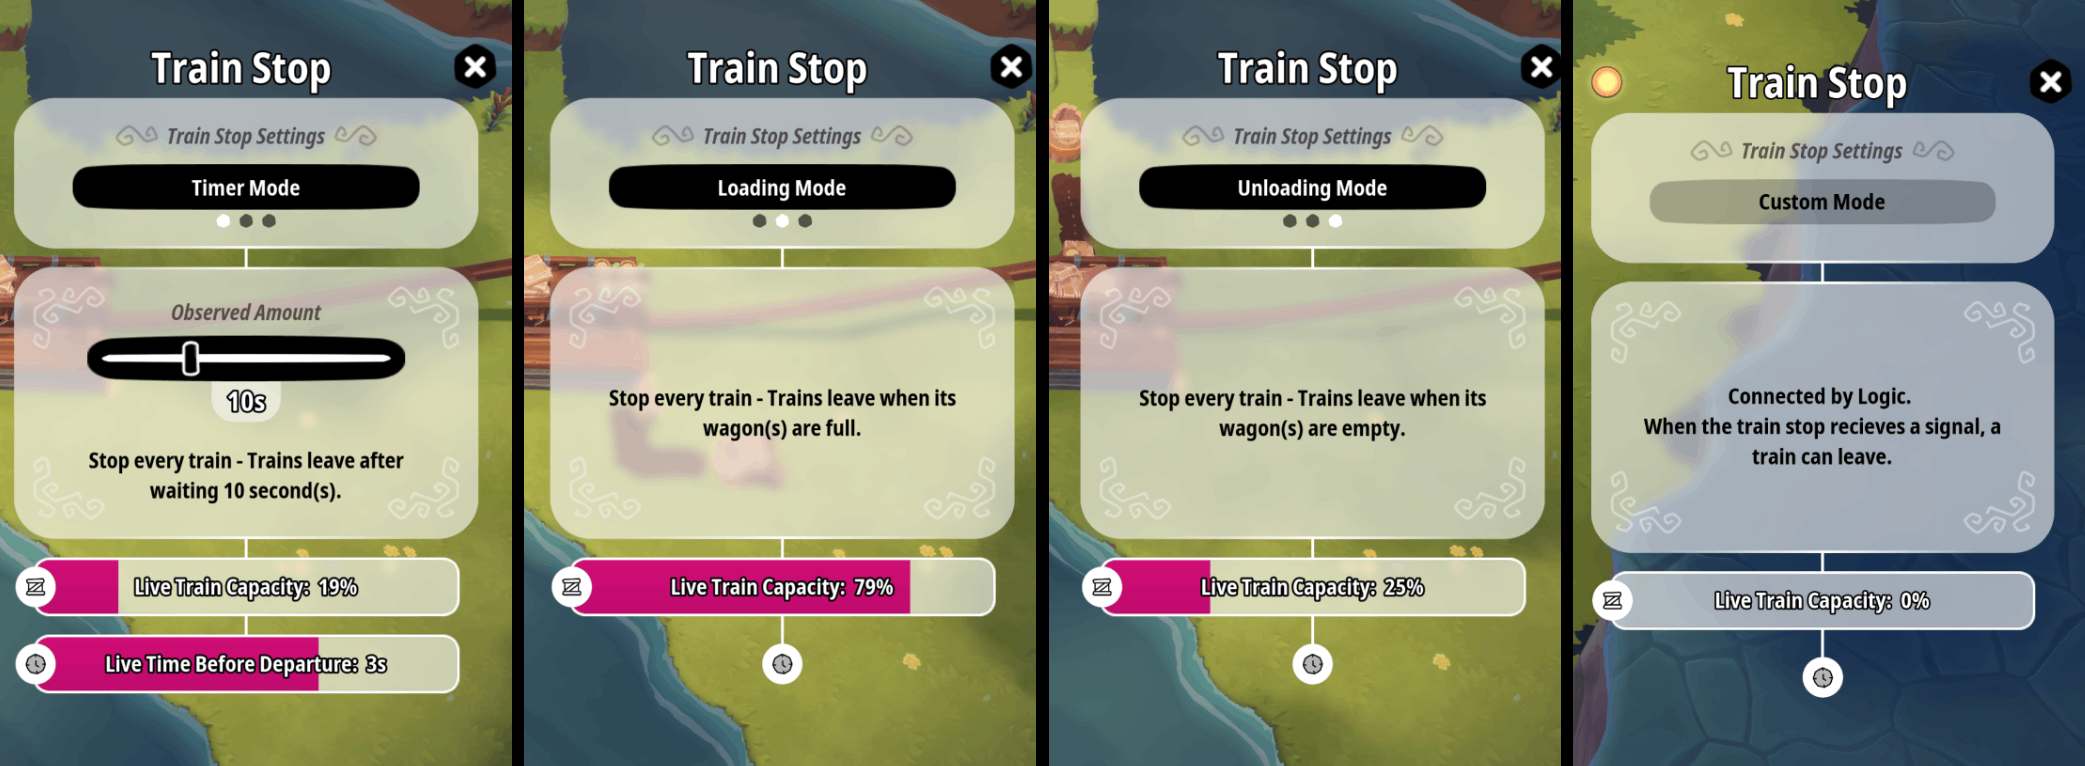
A train stop has lots of different modes and that changes when the train leaves. All you need to know for now is that the default is a “Timer Mode”. So the train will stop, wait for as many seconds as you want and then leave! There’s other modes that we’ll talk about at the end.
You can also manually override all of these modes and just tell the train stop to not let any train leave. Maybe you need to fix whatever problem you have on the tracks, maybe you just want to pause the network. Either way you can just temporarily stop all trains from leaving the station with a press of a button.
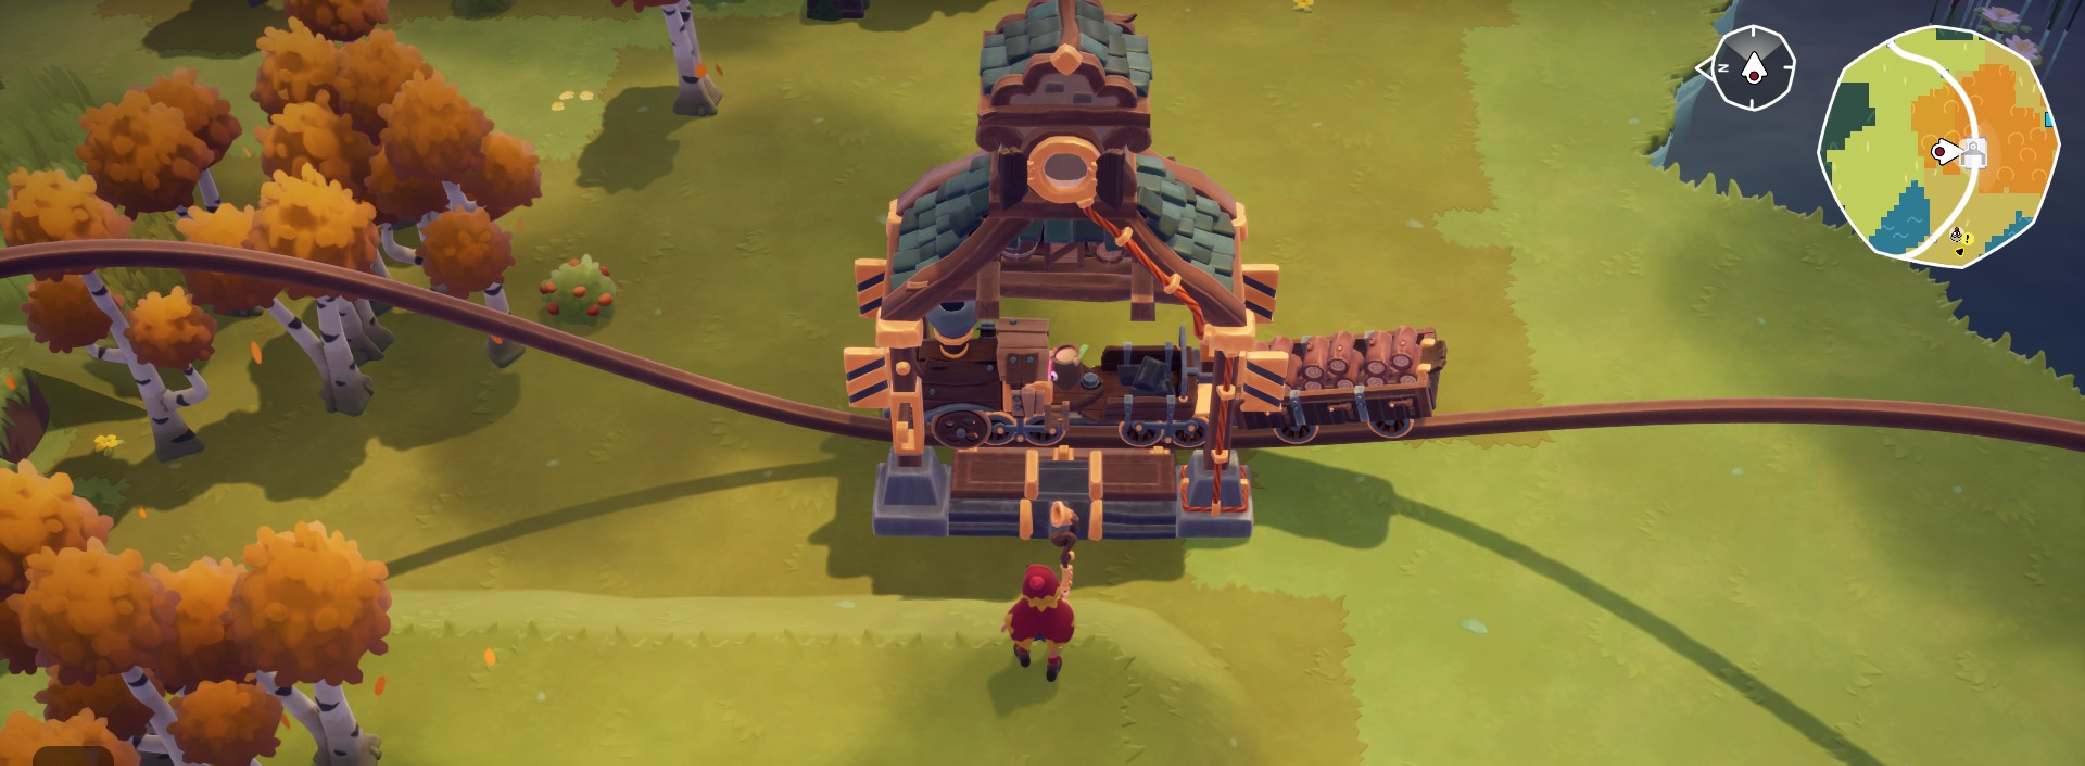
However, the train stop only stops the train. It doesn’t do anything to the wagons. For that, you need the Wagon Loader. The wagon loader allows you to load and unload a wagon using Sparks when it stops in the wagon loader.
The Sparks can load the wagon on one end, and unload the wagon on the other end. You might want to be careful though. The Sparks don’t really know what they’re supposed to load and unload, so if you try to use both at the same time without any logic, they might end up unloading the things you wanted to load!
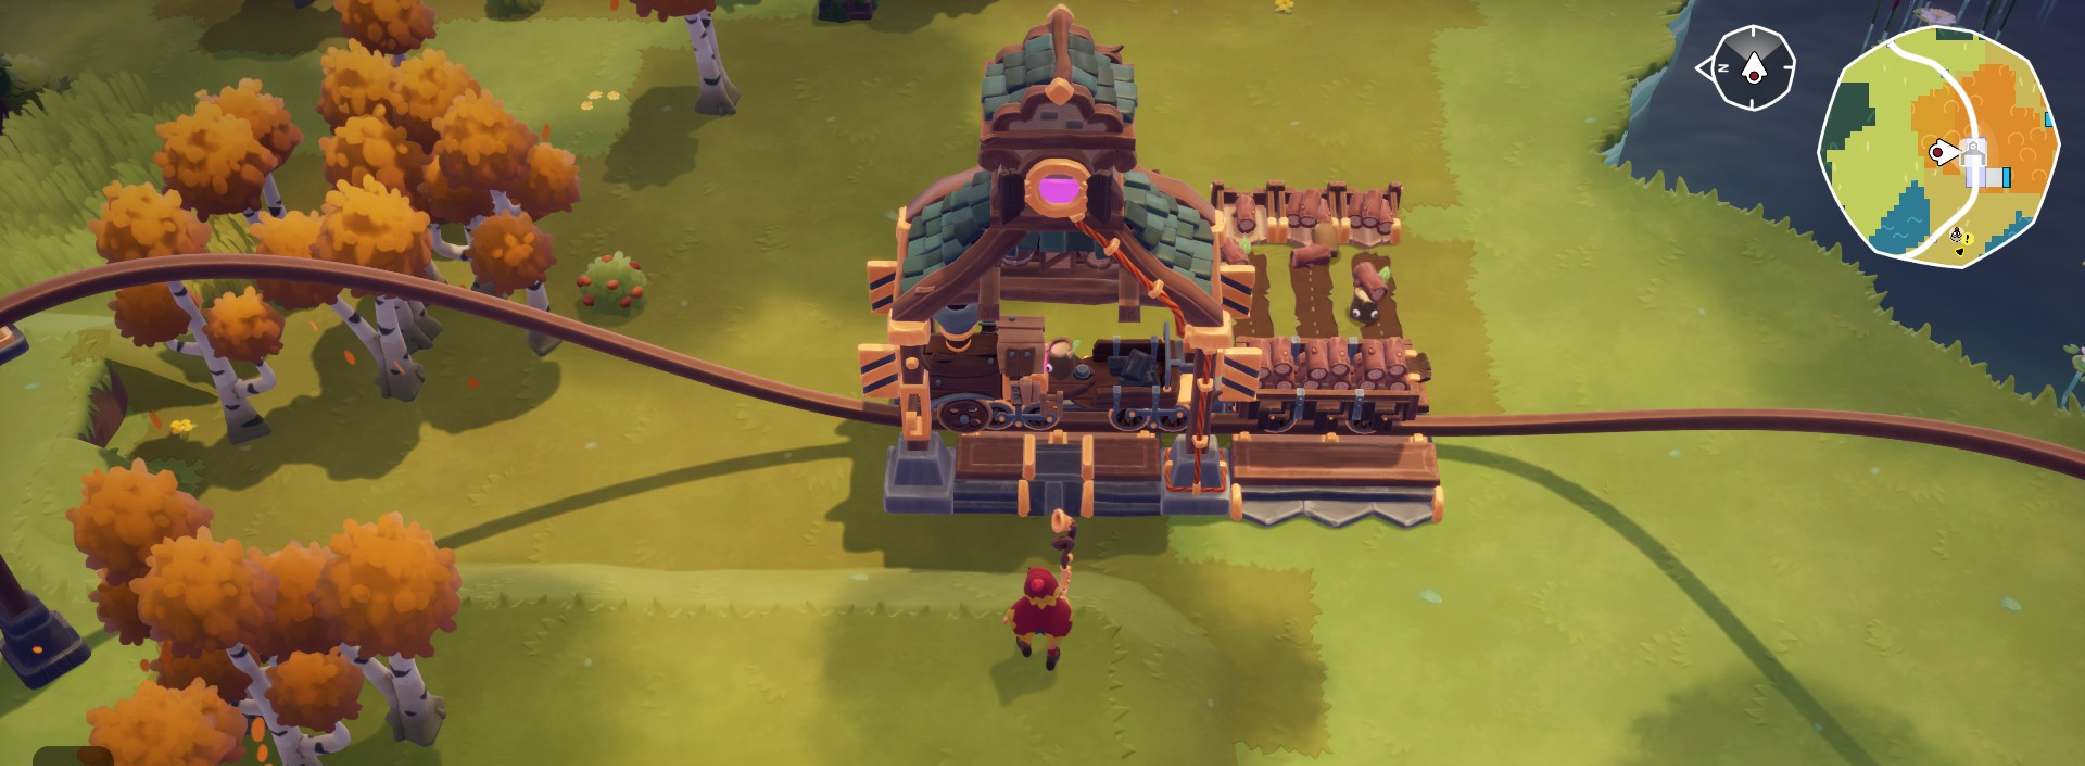
In the beginning, especially if you want to avoid messing with the logic for now, you probably want to just have dedicated “loading” and “unloading” stations. That way the Sparks won’t get confused.
And now you have a basic train network! Choo choo!
Train Stop Modes
You know about the default mode of the train stop, but there’s actually four different modes in total, so you can set up different kinds of train stations.
- Timer Mode – A train will stop for a number of seconds and then leave.
- Loading Mode – A train will stop and only leave when its wagons are full.
- Unloading Mode – A train will stop and only leave when its wagons are empty.
- Custom Mode – The train stop is connected via logic, and the train will leave if the train stop is currently receiving a signal.
The first three modes should cover the basic use cases and when you want to start introducing logic, you can do more complex things! You can use the Capacity Sensor on the wagon loader to see if the wagon on it is empty or full to have a train station that actually unloads and then loads. You can use the Counter Gate to only fill up every second train. With path system, the logic wires, and the trains, you’ll be able to have three different spaghetti networks overlaid on top of each other!
Junction Basics
The junctions are pretty simple. Each train pole can handle up to three connections – One “front” connection to the next pole, one “back” connection to the previous pole and one “to the side” connection to a third pole.
You can open up a pole to add identifiers to the junctions. They interact with the train identifiers! Let’s say you have two trains. Train 1 has a log as an identifier and Train 2 has a stone. When they come to the junction, if one of the junction identifiers is a stone, then Train 2 with the stone will take the side route, while Train 1 with the log will take the straight route.
The identifiers are separate from each other, not additive. So if you have a stone and a log as a junction identifier, then both Train 1 with only a log and Train 2 with only a stone will take the side junction.
You can also do more complex constructions by attaching train poles and junctions to logic, but we’ll let you figure that one out.
We’re looking forward to you playing with the trains when we release our Trains and Trains update, which should be around latter half of August! We’ve already been showing off parts of our train over at our Discord if you want to see WIPs.
After reading all of this about the trains, you might be thinking, hm, I don’t know if we really need the trains with the biomes and the overall space that’s in the current version. Well, next devlog, we’ll talk about a smaller feature that’s on our roadmap for August – “Biome Variations”. What does that actually mean? How will it play? What do we want to encourage with it? Well, we’ll talk to you about it very soon. See you next month!


